You will need...
- Washi paper (your choice of thickness and colour)
- Awl
- Glue (wallpaper paste is good to use)
- Wire (16 or 18 gauge)
- Wire cutters
- Scissors
- Wood plaque (for stand)
Making the body
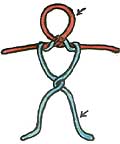
- Modelling the body
After you decide the size of your sculpture, cut 2 wires. 21" & 28", 28" & 36" or 24" & 30".
Shorter wire for the head and arms.
Longer wire for the body and legs.
Make a ball of washi paper (very firm and tight). Insert into the circle of wire for the head.

- Making the head
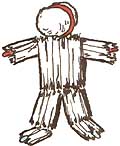
- Building the body
Take a bunch of cut paper and lay in between body wires front and back, around the arms and legs.
Cut a ribbon from washi paper and paste glue on.
Tighten around the bunch of cut paper while wrapping with glued washi paper ribbons.
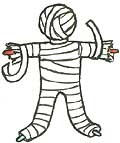
- Wrapping the body
Making the hands
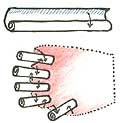
- Making the fingers
Glue a tightly rolled strip of washi paper, then put glue on the ends. I make these long and thick enough to make two fingers with each roll.
Lay the finished roll of fingers on the glued washi paper, cut between the fingers, roll paper around and paste on fingers. Flip over and repeat.
Start to build up fingers with more glued paper, one finger at a time. Then build up thickness on palms and attach to the wrist.

- Building up the fingers
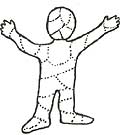
- Building up the rest of the body
Begin building the layers. Before putting on the next layer, make sure it dries overnight. Repeat for 12-15 layers (if I use the thickest paper I only use 8-10 layers).

