You will need:
- Wood lamp stand
- 25 watt lightbulb
- Clothes pattern
- White (pva) glue
- 24 gauge wire
- 1/4" diamond pattern wire mesh
- Scissors
Suppliers:

- Wooden lamp stand
The most inexpensive wood lamp stand I found is at idhandicraft.com. A switch is located on the electric line, not on the socket. You can get a fancy light bulb from any light bulb speciality store.
For a roll of wire mesh, check with Dick Blick art materials or at a local store.
Part 1: Making the flower

- Cutting the mesh
Cut 4, 10" x 10" or 12" x 12", sections from the roll of wire mesh.
Stretch diagonally across the wire mesh & push down in the middle to make a half bowl shape.

- Taking shape

- Shaping the neck

- Shaping the neck
Make a shape for the neck area where it will wrap around the lamp's neck. It should be
at least 1 1/2" long.
If you wish, you may cut the mesh wire with scissors to change the shape. A side view should be varied in order to have more interesting lamp shapes.

- Shaping
Part 2: Pasting

- Pattern paper

- Pattern paper
Hand tear paper pattern. Use areas that have lines and letters to give a more exciting overall design.
Alternatively, you could use torn up magazines......

- Magazines
... or washi paper or any other paper of your choice.

- Dip 'n' Paste
Dip the paper pieces in glue and paste on one side of the wire mesh (A). Let it dry, then cover the other side (B).
TIP:
When you paste down glued paper, use two damp cloths - one on the underside, the other one to press down the glued paper. It will help the paper to bond better and prevent glued paper from sticking to your fingers.

- Using damp cloths

- Decorate lamp stand
Decorate your lamp stand with torn up paper from magazines, coloured paints, woodstain - whichever method you like - go for it!
Part 3: Assembly

- Attaching petals

- Attaching petals
Attach the four petals to the stand in the sequence shown here.
Once the position is right, use the gauge wire to tie it down.

- Gauge wire

- The bulb
Screw in light bulb. Voila!
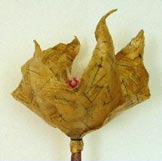
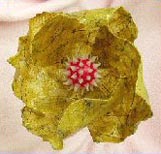
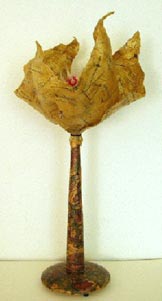
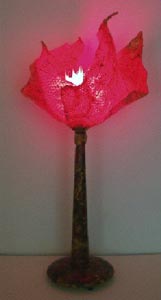
Finished example

- Side view

- Top view

- Switched off

- Switched on
Final words...
This tutorial was written by Ricardo Gonzales and was given to us by the kind permission of . Please visit her website at falkenart.net.


